Similar to RadMulticolumnComboBox but it should allow multiple items to be checked. Please refer to RadDropDownList and RadCheckedDropDownList.
https://docs.telerik.com/devtools/winforms/controls/multicolumncombobox/how-to/multiple-selection
Workaround: avoid using styles with braces in their name.
Apply the Office2010Silver theme to your application since it has a good border indication for the focus in RadSpinEditor.
Please run the attached project and click in the RadSpinEditor that is not in the RadPopupContainer. You will notice that when you move the mouse away that the border is highlighted in yellow showing that the control has complete focus. Now, click in the RadSpinEditor that is in the RadPopupContainer and move your mouse away. You will notice that the border is not highlighted in yellow indicating that it does not have focus. You can also see that it does not fire the GotFocus event. If you click closer to the border out of the "TextBox" area, the control border will stay yellow showing complete focus and fire off the GotFocus event. However, in this case, the caret is not displayed.
Workaround: handle the GotFocus/LostFocus events for the SpinElement.TextBoxItem and apply the desired border for indicating the focus.Please refer to the attached sample project and follow the steps illustrated in the provided gif file.
Workaround:
        public RadForm1()
        {
            InitializeComponent();

            this.radPageView1.SelectedPageChanged += radPageView1_SelectedPageChanged;
        }

        private void radPageView1_SelectedPageChanged(object sender, EventArgs e)
        {
            if (this.radPageView1.SelectedPage != this.radPageViewPage1)
            {
                SelectionMiniToolBar selectionMiniToolBar = this.radRichTextEditor1.RichTextBoxElement.SelectionMiniToolBar as SelectionMiniToolBar;
                if (selectionMiniToolBar != null)
                {
                    selectionMiniToolBar.Hide();
                }
            }
        }
Here is a part of the highlighted document:
Default:
Desired:
Workaround: handle the ExplorerControl.MainNavigationTreeView.NodeFormatting event and replace the node's text with the FileBrowserTreeNode.Label:
Sub New()InitializeComponent()
AddHandler Me.RadOpenFileDialog1.OpenFileDialogForm.ExplorerControl.MainNavigationTreeView.NodeFormatting, AddressOf MainNavigationTreeView_NodeFormatting
Me.RadOpenFileDialog1.ShowDialog()
End Sub
Private Sub MainNavigationTreeView_NodeFormatting(sender As Object, e As Telerik.WinControls.UI.TreeNodeFormattingEventArgs)
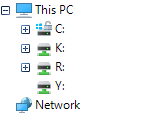
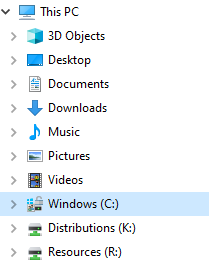
If e.Node.Text = "K:" Then
Dim f As FileBrowserTreeNode = TryCast(e.Node, FileBrowserTreeNode)
If f IsNot Nothing Then
e.Node.Text = f.DataItem.Label
End If
End If
End Sub
Populate a RadGridView with data, move the form to a monitor with greater than 100% DPI scaling. Save the layout and then load it again. You will notice that the columns' width is increased each time.
Workaround:
Sub New()RadControl.EnableDpiScaling = False
InitializeComponent()
End Sub
Currently, RadFileDialogs uses a RadAutoCompleteBox for specifying the folder/file name. It would be nice to have a drop down with recent files:
Paste some text inside RadRichTextEditor. If the text has more rows than the currently visible area you will see that the control does not scroll down to the caret position.
Workaround:
private void RadRichTextEditor1_CommandExecuted(object sender, CommandExecutedEventArgs e)
{
    if (e.Command is PasteCommand)
    {
        Application.DoEvents();

        bool cursorAtDocEnd = this.radRichTextEditor1.Document.CaretPosition.IsPositionAtDocumentEnd;
        if (cursorAtDocEnd)
        {
            MoveCaretCommand command = new MoveCaretCommand(this.radRichTextEditor1.RichTextBoxElement);
            command.Execute(MoveCaretDirections.Down);
        }
    }
}
How to reproduce:
private void RadForm1_Load(object sender, EventArgs e)
{
    this.radWebCam1.TakeSnapshot();
}
Workaround:
public class CustomWebCam : RadWebCam
{
    public override void TakeSnapshot()
    {
        FieldInfo fi = typeof(RadWebCam).GetField("player", BindingFlags.NonPublic | BindingFlags.Instance);
        object value = fi.GetValue(this);

        if (value == null)
        {
            return;
        }

        PropertyInfo propertyInfo = value.GetType().GetProperty("EvrVideoDisplay", BindingFlags.NonPublic | BindingFlags.Instance);
        value = propertyInfo.GetValue(value, null);

        if (value == null)
        {
            return;
        }

        base.TakeSnapshot();
    }
}
Run the attached project and see the .GIF file or follow the steps below:
1. Set AssociatedKeyboardType to a control and KeyboardLayoutType to Numpad;
2. Run the application and drag the whole form to the Right edge of the screen
3. Click inside the control in order to display the RadVirtualKeyboardForm
You will see that the VirtualKeyboardForm is not displayed under the associated control.
Workaround:
After setting the KeyboardLayoutType to Numpad, set the KeyboardForm.Size manually:
this.radVirtualKeyboardForm1.KeyboardForm.Size = this.radVirtualKeyboardForm1.KeyboardForm.VirtualKeyboard.CalculateDesiredSize().ToSize();
Please follow the steps:
1. Create a brand new project with a ShapedForm
2. Set the BackColor property to Red and save the form.
3. Open the ThemeName drop down and close it. You will notice that the BackColor is lost since the ThemeName is serialized as empty string in the designer file.
Workaround: delete the serialized ThemeName property with empty value.
Please refer to the attached gif file for a better illustration of the steps how o reproduce the undesired behavior.
Workaround: use RadForm
Hello,
Is there any way to style the MapCluster Grouped Icon/image in RadMap Winforms? Currently it displays a circle with the total number of grouped items. The background Fill colour of the circle is too dark to enable easy viewing of the number in the circle.
It would be good to depending on the grouped item type, to specify an icon to be used in place of the circle also providing an option to put a label underneath to display (eg "34 Houses")
Specifying different clustered Icons based on the "element type" would provide a clearer summary of the different types of items in a specific area.
Thanks
Please refer to the attached gif file.
Workaround:
        private void Form1_Load(object sender, EventArgs e)
        {
            Image currentImage = this.PropertiesGrid.TableElement.CurrentRowHeaderImage;
            this.PropertiesGrid.TableElement.CurrentRowHeaderImage = new Bitmap(currentImage, currentImage.Width - 5, currentImage.Height - 5);
        }
Please refer to the attached sample project:
Workaround:
        Me.RadImageButtonElement1.ButtonFillElement.GradientStyle = GradientStyles.Solid
        Me.RadImageButtonElement1.ShowBorder = False
1. Create a brand new project and add a ShapedForm.
2. Set the Size to 800,550.
3. Set the FormBorderStyle to FixedToolWindow.
You will notice that at run-time the size is changed to 816, 589.
Workaround:
        public ShapedForm1()
        {
            InitializeComponent();

            this.MaximumSize = new Size(800, 550);
        }