Recently Updated
Unplanned
Last Updated:
25 Jul 2024 12:04
by ADMIN
Created by:
Ketan
Comments:
1
Category:
SplitContainer
Type:
Bug Report
To reproduce:
1. Add three SplitPanels in horizontal mode.
2. Use the following code snippet.
3. Drag the second splitter upwards. It changes the height on the first panel
void RadForm1_Load(object sender, EventArgs e)
{
    FixHeight(splitPanel1);
    FixHeight(splitPanel3);
}

public static void FixHeight(SplitPanel panel)
{
    panel.SizeInfo.MinimumSize = new Size(0, 55);
    panel.SizeInfo.MaximumSize = new Size(0, 55);
}
Unplanned
Last Updated:
27 Jul 2023 12:36
by ADMIN
Created by:
Mark
Comments:
1
Category:
SplitContainer
Type:
Bug Report
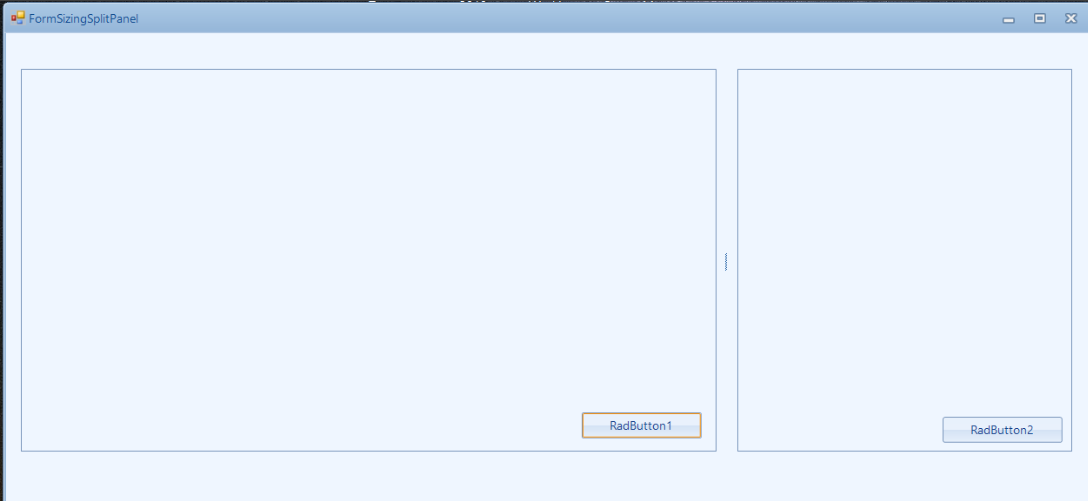
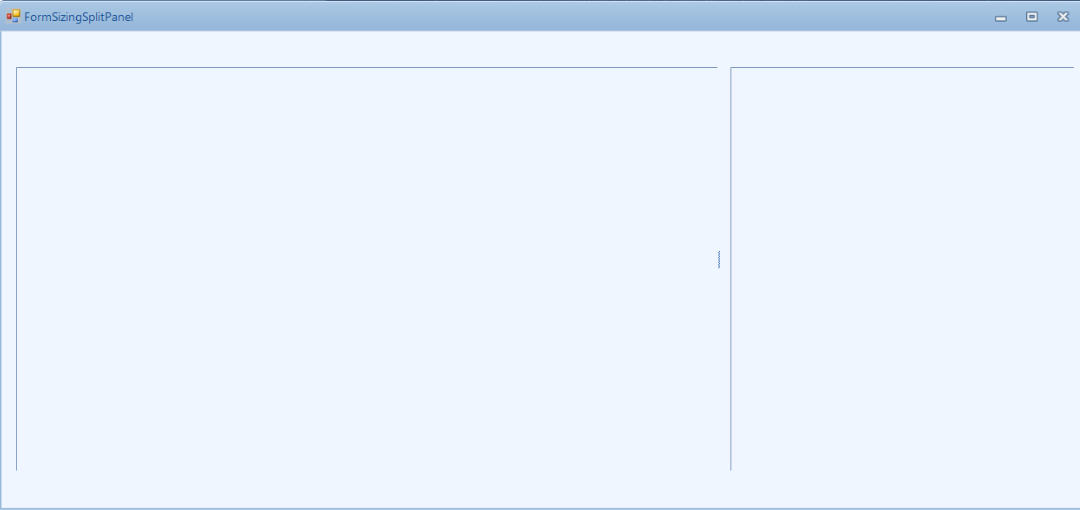
In this particular case, the main monitor has 125% DPI. When showing a RadForm which contains RadSplitContainer with 2 panels, the control is not scaled correctly.
Expected:
Current behavior:
Workaround:
Set the RadControl.EnableRadAutoScale property to false.
Unplanned
Last Updated:
16 May 2019 05:07
by ADMIN
ADMIN
Created by:
Dimitar
Comments:
0
Category:
SplitContainer
Type:
Bug Report
To reproduce:
- Use relative sizing and save the RelativeRatio.
- Set the same value after restarting the application.
- The panel size is not the same.

Workaround:
Use absolute size.
Unplanned
Last Updated:
19 Mar 2019 12:55
by ADMIN
ADMIN
Created by:
Dess | Tech Support Engineer, Principal
Comments:
2
Category:
SplitContainer
Type:
Bug Report
To reproduce:

Add a RadSplitContainer with several SplitPanels and use the following code:
  this.radSplitContainer1.EnableCollapsing = true;
  this.radSplitContainer1.UseSplitterButtons = true;

If you run the project, you will notice that the next/previous buttons are displayed for manipulating the SplitPanel's collapsed/expanded state. If you click one of the next/previous buttons, the relevant SplitPanel will be collapsed and the splitter will remain visible. Thus, the user has the possibility to return the previous state of the SplitPanel. However, if you try to collapse the SplitPanel programmatically by setting the Collapsed property to true, the corresponding splitter will disapper.
Unplanned
Last Updated:
20 Nov 2017 14:13
by ADMIN
ADMIN
Created by:
Hristo
Comments:
0
Category:
SplitContainer
Type:
Feature Request
Unplanned
Last Updated:
20 Nov 2017 12:51
by ADMIN
ADMIN
Created by:
Dess | Tech Support Engineer, Principal
Comments:
0
Category:
SplitContainer
Type:
Feature Request
The scenario that we want to cover is to disable resizing the split panels but still enable the option for expanding/collapsing them via the buttons.
Unplanned
Last Updated:
15 Aug 2017 10:02
by Abed
ADMIN
Created by:
Dimitar
Comments:
3
Category:
SplitContainer
Type:
Feature Request
Add right to left support.

This should be the same as in the standard split container – the panels should be swapped.
Unplanned
Last Updated:
19 Jun 2017 11:00
by ADMIN
ADMIN
Created by:
Dess | Tech Support Engineer, Principal
Comments:
0
Category:
SplitContainer
Type:
Bug Report
To reproduce: add a RadSplitContainer with 3 identical SplitPanels. The left panel needs to be initially collapsed. That is why we use the introduced public API (MoveSplitter method). When the form is shown and you try to expand the left (yellow) panel, you will notice that the splitter is not restored to the correct position. Please refer to the attached gif file.

This must be handled for Vertical and Horizontal orientation!!!

Workaround:

Private Sub RadForm1_Load(sender As Object, e As EventArgs) Handles MyBase.Load
    AddHandler Me.RadSplitContainer1.MouseDown, AddressOf SplitContainerMouseDown
End Sub
Private Sub SplitContainerMouseDown(sender As Object, e As MouseEventArgs)
    Dim clickedElement = Me.RadSplitContainer1.ElementTree.GetElementAtPoint(e.Location)
    If TypeOf clickedElement Is SplitterElement Or TypeOf (clickedElement.Parent) Is SplitterElementLayout Then
        RadSplitContainer1.RestoreSplitterPosition(Me.RadSplitContainer1.Splitters(0))
        RemoveHandler Me.RadSplitContainer1.MouseDown, AddressOf SplitContainerMouseDown
    End If
End Sub
Unplanned
Last Updated:
06 May 2016 13:12
by ADMIN
ADMIN
Created by:
Hristo
Comments:
0
Category:
SplitContainer
Type:
Bug Report
How to reproduce: check the attached project
Workaround: check the attached project
Unplanned
Last Updated:
30 Mar 2016 13:12
by ADMIN
ADMIN
Created by:
Julian Benkov
Comments:
0
Category:
SplitContainer
Type:
Bug Report
I have three split panels and when the auto scroll is enabled some lines appear in the split panel.

The issue can be reproduced with RadPanel as well.

Workaround: http://www.telerik.com/forums/problem-with-auto-scroll#ygV1vwyA40KZ4KoD28AhvQ
Unplanned
Last Updated:
30 Mar 2016 13:12
by ADMIN
ADMIN
Created by:
Julian Benkov
Comments:
0
Category:
SplitContainer
Type:
Bug Report
If the AutoScroll of RadSplitContainer is true and I scroll the container a little, don’t work the resizes of the panels.

sample code:

public Form1()
    {
        InitializeComponent();

        RadSplitContainer radSplitContainer1 = new RadSplitContainer()
        {
            Dock = DockStyle.Fill,
            AutoScroll = true
        };

        this.Controls.Add(radSplitContainer1);

        for (int i = 0; i < 10; i++)
        {
            var panel = new SplitPanel();
            panel.SizeInfo.SizeMode = SplitPanelSizeMode.Absolute;
            panel.SizeInfo.AbsoluteSize = new Size(100, 0);
            radSplitContainer1.SplitPanels.Add(panel);
        }
    }
Unplanned
Last Updated:
30 Mar 2016 13:11
by ADMIN
ADMIN
Created by:
Dimitar
Comments:
0
Category:
SplitContainer
Type:
Bug Report
To reproduce:
- Add button to a split panel
- Set button Text property to "Button &X"
- Add a event handler for the button
- Start the application and press the "x" key

To work around this issue instead of using mnemonics you can set shortcuts like this:
radButton.ButtonElement.Shortcuts.Add(new RadShortcut(Keys.Alt, Keys.X));

Also you can set mnemonic like underline like this:
radButton.Text = "<html>Button <u>X";
Unplanned
Last Updated:
30 Mar 2016 13:11
by ADMIN
ADMIN
Created by:
Dess | Tech Support Engineer, Principal
Comments:
0
Category:
SplitContainer
Type:
Bug Report
To reproduce:
-add RadSplitContainer (horizontal) and add one left and one right split panel
-add two RadButtons to collapse and show one of the panels
private void radButton1_Click(object sender, EventArgs e)
{
    this.splitPanel1.Collapsed = true;
}

private void radButton2_Click(object sender, EventArgs e)
{
    this.splitPanel1.Visible = true;
}
-click the first button to collapse the left panel; as a result the second panel fills the entire container size
-click the second button to show again the left panel; as a result the panels overlap each other


